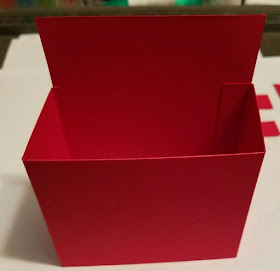
So want to see what I have been creating? Here it is:
I do have to admit that when I added a couple of the items, they are sticking up a bit to high, so will have to go into a larger envelope, so take care of that. Otherwise these would measure the same as an A2 card, 4 1/4" x 5 1/2".
The sign on the red one, the brushes and pen on the pink one needed to come down just a bit.
Want to know the details? Here they are:
Cut the cardstock in half length wise, measuring 4 1/4" x 11. Set one piece to the side. Score the other one at 3 1/2", 5 1/4", 8 3/4", and 10 1/2". From the end with the tab, cut away 1 1/4" from the end to the first score you created at 3 1/2". This will leave a larger area for the back of the toolbox.
In the middle of the strip, cut 1/2" to the left of the first score and the same to the right of the second score. Cut the strip in half lengthwise. This will create the two 5/8" strips that will fit into the box to hold your embellishments.
Take the large piece and crease all of the scores and form the box.
Add the strips that you created to the center:
From a scrap piece or the other half that you set aside, cut three pieces 3 1/4"x 3/4". These will be your drawers for the front of the tool box.
For Dad's tool box, I added the silver ribbon to the top of the back and to each drawer. The drawers are added to the box with dimensionals. I used the Nailed It Bundle (sure hope you were able to get one, before they retired), for the tools and the sign. I cut each tool out with Whisper White and Silver Foil, colored the white with the Watercolor pencils, cut off the handles and added them to the tools. I then added the cut offs to the back of the foil for a little more support.
Punch out tiny holes on the saw handle before attaching to the foil (where the "rivets" are). I also used a pair of deckle scissors to make the blade teeth. For the tape measure, I inked the die and pressed it onto the Whisper White, then cut it out.
Now for Her's:
The only difference in the construction is that I used DSP from the Painter's Pallet stack. The back is 3 1/4" x 3", sides are (2) 1 1/2" x 2 3/4", and the drawers are 3 1/8" x 3/8". I then added the gold ribbon instead of silver.
Lie them flat to place into the envelope.
Hope you enjoy these and give them a try. Let me know if you have any questions. I would love to hear what design you created with yours.
Have a great day and thank you so much for stopping by!


No comments:
Post a Comment