Monday, June 30, 2014

Fourth of July sparkler


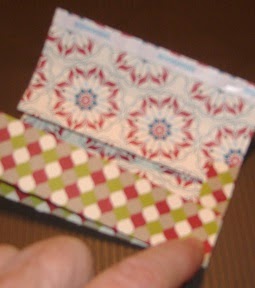
No, I haven't replaced the batteries yet, in my camera, but did find some strong enough to transfer the images to my computer! This is a really simple card using up scraps of DSP. The base is Night of Navy with the DSP sectioned off for the top and the bottom with a strip of ribbon between. I stamped the sparklers with Night of Navy ink on to Real Red cardstock, cut them out and attached them to the card with dimensionals. Oh, and added some gold sparkle on the tips with glitter glue!

Hope you enjoy this project and have a great day! Thanks for stopping by!!!!

Tuesday, June 24, 2014

Mini Treat Bag

I have actually run out of pictures for my recent cards! Don't worry I have several on my camera and more samples to take pictures of, for you. My problem......the batteries died in my camera!!! That rather stopped production. Of course, I don't have any extra on hand, so will have to wait until I can get somewhere to purchase new ones. Unlike some, I can't just run into town or down the street. :(

I don't believe I have shared this project with you, though, so all is not lost!


This gives you an idea of the size of the bag. You can add handles and decorate in so many ways!

                                                           MINI TREAT BAG

                                        from one sheet of paper stack (4 ½" x 6 ½" )

With long side to the top of the score board, score @ 1", 1 ½" , 2", 4", 4 ½" , and 5"

Turn short end to the top and score at 4"


Leaving the center 2" x ½" tab, cut off the rest of the ½" strip.


Crease all scores. Place tape on tab and one side.


Fold tab on top of side gussets and attach the bag sides.
                                                 
Trim the top edge with decorative scissors. Decorate and fill as desired.

Have a great day, and thanks so much for stopping by!!!

Thursday, June 19, 2014

Woodgrain thinking of you


This card was created on a Rich Razzleberry base and uses the new woodgrain stamp (which I LOVE!) and Stippled Blossoms stamp set. It goes together quick and easy! I highlighted with some Stickles on the roses and leaves. I also used it at the "brads" on the thinking of you sign. To create the tag, I slipped one end into the back of my 2" scalloped circle punch and punched a small opening. To save on your supplies, don't forget to cut the paper doily in half.

Hope you enjoy this card and give it a try. Thanks for stopping by!

Wednesday, June 18, 2014

Butterflies and Flowers


I was having a down day and needed a pick-me-up. So, not only did card making fill the bill, but these colors helped a lot, too! I used Whisper White as the card base and trimmed off the cover with an edgelit, backing it with a strip of colored cardstock large enough to match the back cover. I used Bordering on Romance stamp set for the flowers, coloring with my markers. I actually colored three sets of the flowers and layered them on top with dimensionals, (stamping on the card base, then twice on scrap card stock, cutting out the two largest flowers, then the top large flower.) The butterflies are from the Papillion Potpourri stamp set. I folded the wings a bit to make them 3D also.

This card still makes my soul smile, so guess I accomplished my goal! Hope it works for you, too.

Have a great day and thanks so much for stopping by!!!

Tuesday, June 17, 2014

Mickey and Minnie


This was made for a special little five year old. Wouldn't it be great for an anniversary or wedding for someone who is a Disney fan. This is made of basic shapes and punches! I embossed the white heart to add a bit of texture behind the pair. I thought it was too plain other wise. The face fixtures should have been a bit larger, but my recipient loved it, so that is all that matters. In fact it is still sitting on her book case!

Hope you have a great day and, as always, thanks so much for stopping by!

Monday, June 16, 2014

Washi pinwheel card


I have usually used strips of designer series paper to create this style of card, but when I received several rolls of washi tape, I decided to use them. This card was created as a Valentine's card, but it would have been a nice Christmas card, also, I think. Of course, I had to add a little bling, too, which if you look closely, the shiny spots are rhinestones.

Have a great day and thanks for stopping by!!!

Saturday, June 14, 2014

Double Heart "carving"


Although I created this card for Valentine's Day, it would be great for an anniversary or wedding card also. It reminds me of the hearts carved into a tree.

I actually created the wood look background with a technique called Milk Paint. Start by marking your card stock using the white ink, swiping it across leaving plenty of uninked areas. You should let this dry really well (patience is not one of my virtues, so I rarely do this). You can use the heat tool to speed this process. Then using a ruler, draw in your boards, adding nail heads and cracks. Or you can use our new Hardwood stamp on page 175 of the catalog!!!! Don't you love Stampin' Up!!!!

I used a sponge to die the doily (page 192 ) with the same ink as my card stock, punched out a couple of hearts and added a banner. That was it......fast and easy!

Hope you enjoy this project and thanks so much for stopping by!

Have a GREAT day!

Sunday, June 8, 2014

Bordering on Romance

Wow, I sure don't know where the time goes! It doesn't seem that long ago since I posted, but the dates prove otherwise!


I have been doing some creating, though! I have been trying to create cards that can be used for notes or can later on have a sentiment stamped to the inside for a special occasion. This is one of those cards using one of my favorite floral sets, Bordering On Romance. I used my markers to color in the flowers, Petals-a-Plenty to emboss the cover and finished it off with a bit of ribbon. It was very quick and easy (two of my favorite things, which is why I love creating cards!!)

Hope you have a great day and thank you so much for stopping by!